We had published a tutorial on how to install Nextcloud on Ubuntu 16.04 with Apache web server back in June 2016, shortly after the first public release of Nextcloud. But many folks want to use Nginx rather than Apache as the web server. So in this tutorial we will see how to install Nextcloud 11 on Ubuntu 16.04 with Nginx.
Prerequisites
First, you should check out this LEMP install tutorial for Ubuntu 16.04 if you haven’t installed LEMP yet. Once it’s installed, come back here and read on.
Step 1: Download NextCloud 12.0.3
Download the NextCloud server zip archive onto your server. The latest stable version is 11.0.2 at time of this writing. You may need to change the version number. Go to
https://nextcloud.com/install and click the download button to check
out the latest version.
wget https://download.nextcloud.com/server/releases/nextcloud-12.0.3.zip
Extract it.
sudo apt install unzip

unzip nextcloud-12.0.3.zip
A new directory named nextcloud will
be created in the current working directory. Move the new directory and all
of its content to the document root of Nginx web server
sudo mv nextcloud /usr/share/nginx/
Then you also need to give Nginx user (www-data) write permission.
sudo chown www-data:www-data /usr/share/nginx/nextcloud/ -R
Step 2: Create a Database and User in MariaDB
Log into MariaDB database server with the following command:
mysql -u root -p
Then create a database for Nextcloud. This tutorial name the database nextcloud. You can use whatever name you like.
create database nextcloud;
Create the database user. Again, you can use your preferred name for this user. Replace your-password with your preferred password.
create user nextclouduser@localhost identified by 'your-password';
Grant this user all privileges on the nextcloud database.
grant all privileges on nextcloud.* to nextclouduser@localhost identified by 'your-password';
Flush privileges and exit.
flush privileges;

exit;
Step 3: Enable Binary Logging in MariaDB
Edit the mysqld configuration file.
sudo nano /etc/mysql/mariadb.conf.d/50-server.cnf
Add the following three lines in [mysqld] section.
log-bin        = /var/log/mysql/mariadb-bin
log-bin-index  = /var/log/mysql/mariadb-bin.index
binlog_format  = mixed
The format of binary log must be mixed.
Save and close the file. Then restart MariaDB service.
sudo systemctl restart mysql
Now binary log is enabled in MariaDB.
Step 4: Create an Nginx Config File for Nextcloud
Create a nextcloud.conf file
in /etc/nginx/conf.d/ directory.
sudo nano /etc/nginx/conf.d/nextcloud.conf
Put the following text into the file. Replace the red-colored text with your actual data. Don’t forget to set A record for the domain name.
server {
    listen 80;
    server_name nextcloud.your-domain.com;

    # Add headers to serve security related headers
    add_header X-Content-Type-Options nosniff;
    add_header X-Frame-Options "SAMEORIGIN";
    add_header X-XSS-Protection "1; mode=block";
    add_header X-Robots-Tag none;
    add_header X-Download-Options noopen;
    add_header X-Permitted-Cross-Domain-Policies none;

    # Path to the root of your installation
    root /usr/share/nginx/nextcloud/;

    location = /robots.txt {
        allow all;
        log_not_found off;
        access_log off;
    }

    # The following 2 rules are only needed for the user_webfinger app.
    # Uncomment it if you're planning to use this app.
    #rewrite ^/.well-known/host-meta /public.php?service=host-meta last;
    #rewrite ^/.well-known/host-meta.json /public.php?service=host-meta-json
    # last;

    location = /.well-known/carddav {
        return 301 $scheme://$host/remote.php/dav;
    }
    location = /.well-known/caldav {
       return 301 $scheme://$host/remote.php/dav;
    }

    location ~ /.well-known/acme-challenge {
      allow all;
    }

    # set max upload size
    client_max_body_size 512M;
    fastcgi_buffers 64 4K;

    # Disable gzip to avoid the removal of the ETag header
    gzip off;

    # Uncomment if your server is build with the ngx_pagespeed module
    # This module is currently not supported.
    #pagespeed off;

    error_page 403 /core/templates/403.php;
    error_page 404 /core/templates/404.php;

    location / {
       rewrite ^ /index.php$uri;
    }

    location ~ ^/(?:build|tests|config|lib|3rdparty|templates|data)/ {
       deny all;
    }
    location ~ ^/(?:\.|autotest|occ|issue|indie|db_|console) {
       deny all;
     }

    location ~ ^/(?:index|remote|public|cron|core/ajax/update|status|ocs/v[12]|updater/.+|ocs-provider/.+|core/templates/40[34])\.php(?:$|/) {
       include fastcgi_params;
       fastcgi_split_path_info ^(.+\.php)(/.*)$;
       fastcgi_param SCRIPT_FILENAME $document_root$fastcgi_script_name;
       fastcgi_param PATH_INFO $fastcgi_path_info;
       #Avoid sending the security headers twice
       fastcgi_param modHeadersAvailable true;
       fastcgi_param front_controller_active true;
       fastcgi_pass unix:/run/php/php7.0-fpm.sock;
       fastcgi_intercept_errors on;
       fastcgi_request_buffering off;
    }

    location ~ ^/(?:updater|ocs-provider)(?:$|/) {
       try_files $uri/ =404;
       index index.php;
    }

    # Adding the cache control header for js and css files
    # Make sure it is BELOW the PHP block
    location ~* \.(?:css|js)$ {
        try_files $uri /index.php$uri$is_args$args;
        add_header Cache-Control "public, max-age=7200";
        # Add headers to serve security related headers (It is intended to
        # have those duplicated to the ones above)
        add_header X-Content-Type-Options nosniff;
        add_header X-Frame-Options "SAMEORIGIN";
        add_header X-XSS-Protection "1; mode=block";
        add_header X-Robots-Tag none;
        add_header X-Download-Options noopen;
        add_header X-Permitted-Cross-Domain-Policies none;
        # Optional: Don't log access to assets
        access_log off;
   }

   location ~* \.(?:svg|gif|png|html|ttf|woff|ico|jpg|jpeg)$ {
        try_files $uri /index.php$uri$is_args$args;
        # Optional: Don't log access to other assets
        access_log off;
   }
}
Save and close the file. Test Nginx configuration, then reload Nginx for the changes to take effect.
sudo nginx -t

sudo systemctl reload nginx
Step 5: Install and Enable PHP Modules
Run the following commands to install needed PHP modules.
sudo apt install php7.0-common php7.0-gd php7.0-json php7.0-curl php7.0-zip php7.0-xml php7.0-mbstring
Step 6: Enable HTTPS
Now you can access the Nextcloud web install wizard in your browser by entering the domain name for your Nextcloud installation.
nextcloud.your-domain.com
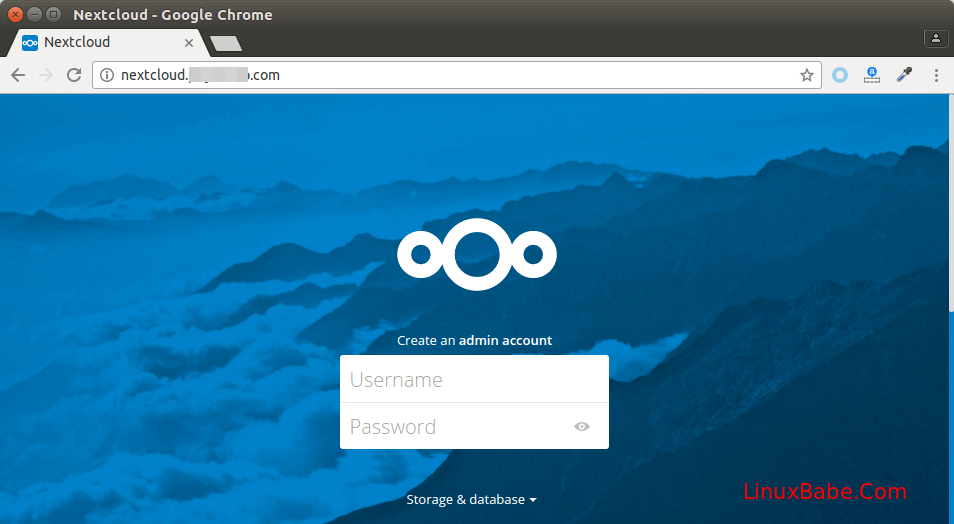
But before entering any sensitive information, we should enable secure HTTPS connection on Nextcloud. We can obtain a free TLS certificate from Let’s Encrypt.
Install certbot (Let’s Encrypt) client from Ubuntu 16.04 repository.
sudo apt install letsencrypt
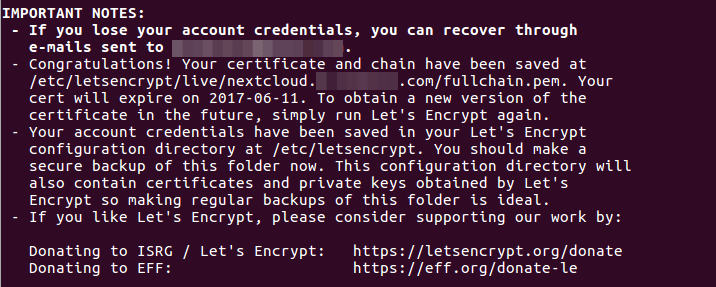
Next, run the following command to obtain a free TLS certificate using the webroot plugin.
sudo letsencrypt certonly --webroot --agree-tos --email your-email-address -d nextcloud.your-domain.com -w /usr/share/nginx/nextcloud/
Within a few seconds, you shall see a message like below, which means the TLS certificate was successfully obtained.
Now let’s install the TLS certificate. Edit nextcloud.conf file.
sudo nano /etc/nginx/conf.d/nextcloud.conf
Change the configuration as follows to redirect HTTP to HTTPS.
server {
    listen 80;
    server_name nextcloud.your-domain.com;
    return 301 https://$server_name$request_uri;
}

server {
    listen 443 ssl http2;
    server_name nextcloud.your-domain.com;

    ssl_certificate /etc/letsencrypt/live/nextcloud.your-domain.com/fullchain.pem;
    ssl_certificate_key /etc/letsencrypt/live/nextcloud.your-domain.com/privkey.pem;

    ssl_session_timeout 1d;
    ssl_session_cache shared:SSL:10m;
    ssl_session_tickets off;
    ssl_protocols TLSv1.1 TLSv1.2;
    ssl_prefer_server_ciphers on;

    ssl_ciphers 'ECDHE-ECDSA-AES256-GCM-SHA384:ECDHE-RSA-AES256-GCM-SHA384:ECDHE-ECDSA-CHACHA20-POLY1305:ECDHE-RSA-CHACHA20-POLY1305:ECDHE-ECDSA-AES128-GCM-SHA256:ECDHE-RSA-AES128-GCM-SHA256:ECDHE-ECDSA-AES256-SHA384:ECDHE-RSA-AES256-SHA384:ECDHE-ECDSA-AES128-SHA256:ECDHE-RSA-AES128-SHA256';

    # Add headers to serve security related headers
    # Before enabling Strict-Transport-Security headers please read into this
    # topic first.
    add_header Strict-Transport-Security "max-age=15768000;preload" always;
    add_header X-Content-Type-Options nosniff;
    add_header X-Frame-Options "SAMEORIGIN";
    add_header X-XSS-Protection "1; mode=block";
    add_header X-Robots-Tag none;
    add_header X-Download-Options noopen;
    add_header X-Permitted-Cross-Domain-Policies none;

    # Path to the root of your installation
    root /usr/share/nginx/nextcloud/;

    location = /robots.txt {
        allow all;
        log_not_found off;
        access_log off;
    }

    # The following 2 rules are only needed for the user_webfinger app.
    # Uncomment it if you're planning to use this app.
    #rewrite ^/.well-known/host-meta /public.php?service=host-meta last;
    #rewrite ^/.well-known/host-meta.json /public.php?service=host-meta-json
    # last;

    location = /.well-known/carddav {
        return 301 $scheme://$host/remote.php/dav;
    }
    location = /.well-known/caldav {
       return 301 $scheme://$host/remote.php/dav;
    }

    location ~ /.well-known/acme-challenge {
      allow all;
    }

    # set max upload size
    client_max_body_size 512M;
    fastcgi_buffers 64 4K;

    # Disable gzip to avoid the removal of the ETag header
    gzip off;

    # Uncomment if your server is build with the ngx_pagespeed module
    # This module is currently not supported.
    #pagespeed off;

    error_page 403 /core/templates/403.php;
    error_page 404 /core/templates/404.php;

    location / {
       rewrite ^ /index.php$uri;
    }

    location ~ ^/(?:build|tests|config|lib|3rdparty|templates|data)/ {
       deny all;
    }
    location ~ ^/(?:\.|autotest|occ|issue|indie|db_|console) {
       deny all;
     }

    location ~ ^/(?:index|remote|public|cron|core/ajax/update|status|ocs/v[12]|updater/.+|ocs-provider/.+|core/templates/40[34])\.php(?:$|/) {
       include fastcgi_params;
       fastcgi_split_path_info ^(.+\.php)(/.*)$;
       fastcgi_param SCRIPT_FILENAME $document_root$fastcgi_script_name;
       fastcgi_param PATH_INFO $fastcgi_path_info;
       #Avoid sending the security headers twice
       fastcgi_param modHeadersAvailable true;
       fastcgi_param front_controller_active true;
       fastcgi_pass unix:/run/php/php7.0-fpm.sock;
       fastcgi_intercept_errors on;
       fastcgi_request_buffering off;
    }

    location ~ ^/(?:updater|ocs-provider)(?:$|/) {
       try_files $uri/ =404;
       index index.php;
    }

    # Adding the cache control header for js and css files
    # Make sure it is BELOW the PHP block
    location ~* \.(?:css|js)$ {
        try_files $uri /index.php$uri$is_args$args;
        add_header Cache-Control "public, max-age=7200";
        # Add headers to serve security related headers (It is intended to
        # have those duplicated to the ones above)
        # Before enabling Strict-Transport-Security headers please read into
        # this topic first.
        add_header Strict-Transport-Security "max-age=15768000;preload" always;
        add_header X-Content-Type-Options nosniff;
        add_header X-Frame-Options "SAMEORIGIN";
        add_header X-XSS-Protection "1; mode=block";
        add_header X-Robots-Tag none;
        add_header X-Download-Options noopen;
        add_header X-Permitted-Cross-Domain-Policies none;
        # Optional: Don't log access to assets
        access_log off;
   }

   location ~* \.(?:svg|gif|png|html|ttf|woff|ico|jpg|jpeg)$ {
        try_files $uri /index.php$uri$is_args$args;
        # Optional: Don't log access to other assets
        access_log off;
   }
}
Save and close the file. Test Nginx configuration, then reload Nginx for the changes to take effect.
sudo nginx -t

sudo systemctl reload nginx
Finish the Installation in your Web Browser
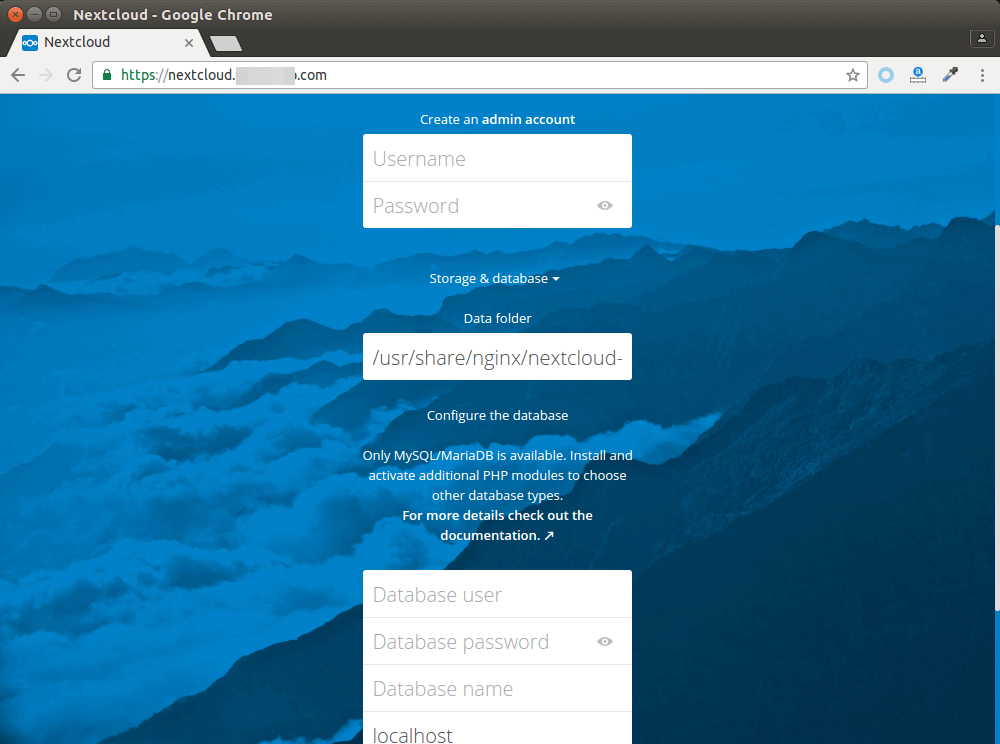
Now you can access the Nextcloud web install wizard using HTTPS connection. To complete the installation, you need to create an admin account, enter the path of Nextcloud data folder, enter database details created earlier.
The data folder is where users’ files are stored. For security, it’s best
to place the data directory outside of Nextcloud web root. So instead of
storing users’ files under /usr/share/nginx/nextcloud/data/,
we can change it to /usr/share/nginx/nextcloud-data. which
can be created with the following command:
sudo mkdir /usr/share/nginx/nextcloud-data
Then make sure Nginx user (www-data)
has write permission to the data directory.
sudo chown www-data:www-data /usr/share/nginx/nextcloud-data -R
Once it’s done, you will see the Web interface of Nextcloud. Congrats! You can start using it as your private cloud storage.
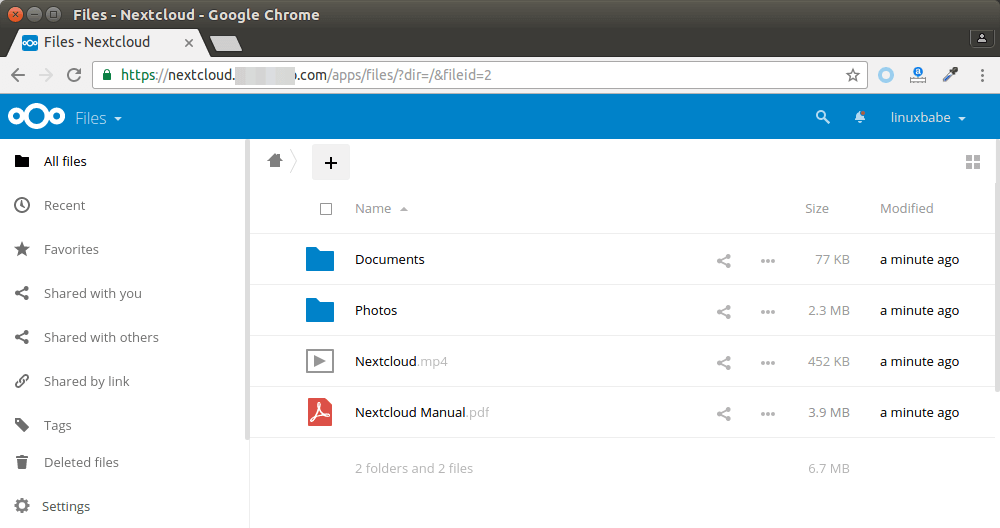
That’s it!