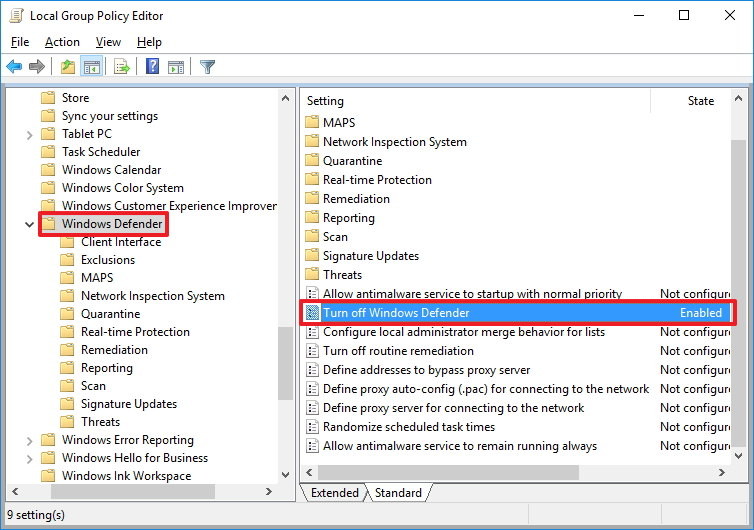
Browse the following path:
	Computer Configuration > Administrative Templates > Windows Components >
	Windows Defender
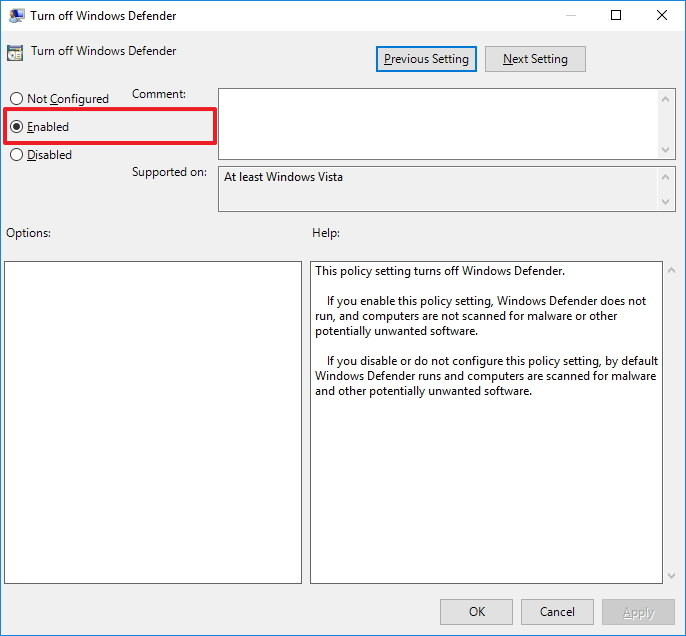
On the right, double-click Turn off Windows Defender.
Click OK.
If you're using Windows 10 Pro or any other enterprise variant, such as Windows 10 Enterprise or Windows 10 Education, you can use the Local Group Policy Editor to disable Windows Defender from your computer permanently.
Browse the following path:
Computer Configuration > Administrative Templates > Windows Components >
Windows Defender
On the right, double-click Turn off Windows Defender.
Click OK.
Once you complete the above steps, you will notice the Windows Defender shield icon will continue to run in the system tray. To get rid of the icon, simply restart your computer.
At any time, if you want to re-enable Windows Defender, you only need to follow the same steps, but this time, on step 5 select the option Not configured. Then restart your computer to complete reverting the changes.
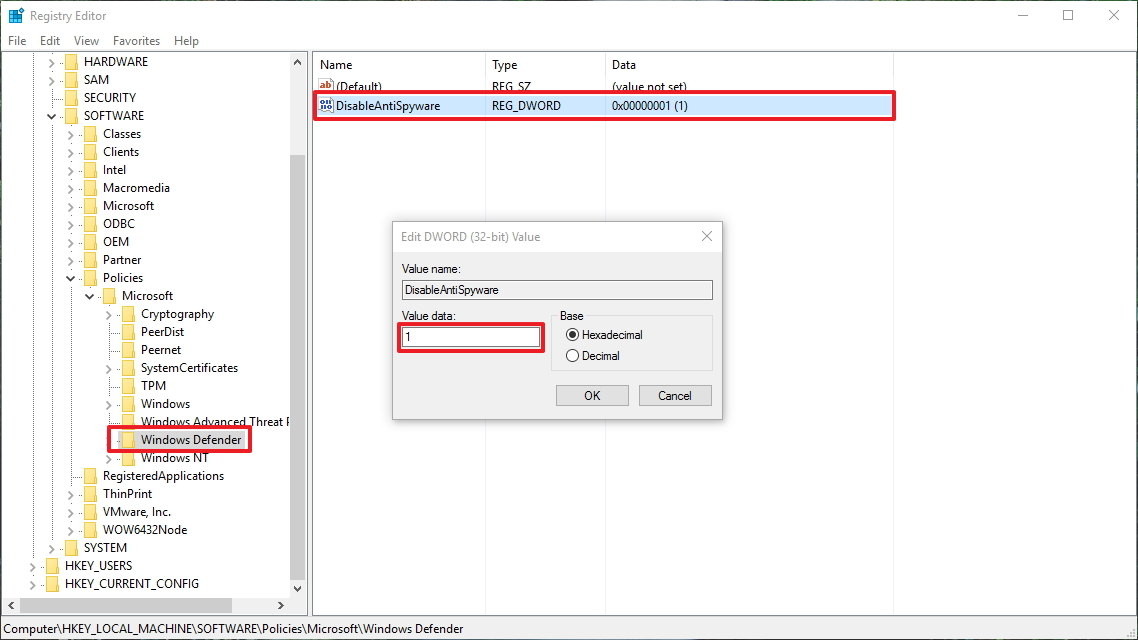
If you're running Windows 10 Home, you won't have access to the Local Group Policy Editor, as it's only available for enterprise versions of the operating system. However, you can modify the registry to accomplish the same result.
Important: Before diving into this guide, it's worth noting that editing the registry can be dangerous, and it can cause irreversible damage to your system if you don't do it correctly. It's highly recommended to make a full backup of your system before proceeding. You've been warned!
Browse the following path:
HKEY_LOCAL_MACHINE\SOFTWARE\Policies\Microsoft\Windows Defender
Double-click the newly created key, and set the value from 0 to 1.
At any time, if you want to re-enable Windows Defender, you only need to follow the same steps, but this time, change the value on step 5 from 1 to 0. Then restart your computer to complete reverting the changes.