EASY STEPS >>> N910T3 -> DOFC/DOG1 -> HOW TO ROOT [MANUALLY] - TWRP RECOVERY -> Done!
AUTOMATIC REALLY EASY WAY WITH *ROOTED*KNOX FREE*SD CARD WRITE FIX* ALL READY GO
HERE
> > > THIS THREAD IS ABOUT HOW TO ROOT & FLASH CUSTOM RECOVERY TO YOUR NEW T-MOBILE N910T3UVU1DOFC / N910T3UVU1DOG1 LOLLIPOP 5.1.1 SM-N910T3 NOTE 4 < < <
THIS IS THE N910T3 MANUAL ROOT GUIDE!
THIS GUIDE IS FOR N910T3 USERS
Latest ROM :
N910T3UVU1DOK2_N910T3TMB1DOK2_TMB.zip
Previous ROM:
N910T3UVU1DOG1_N910T3TMB1DOG1_TMB.zip
Current Kernel ->
DOG1_N4_Kernel_TEKHD.zip
Previous Kernel ->
DOFC_N4_Kernel_TEKHD.zip
> > Before you Begin! -> Please note that this will trip your KNOX Counter!!!
˅ ˅ ˅ - - - G U I D E - - - S T A R T S - - - H E R E - - - ˅ ˅ ˅
WHAT YOU WILL NEED > > >
ODIN | RECOVERY
TWRP |
KERNEL |
SuperSU Also, just in case, Samsung
USB Drivers.
UPDATE: NEW KERNEL WITH WIFI CALLING + VOLTE -> http://forum.xda-developers.com/note...910t3-t3238775
Finally Download
LOLLIPOP - Ext SD Card Write Fix
ROOTING YOUR ORIGINAL STOCK ROM . . . (N910T3UVU1DOFC / N910T3UVU1DOG1)
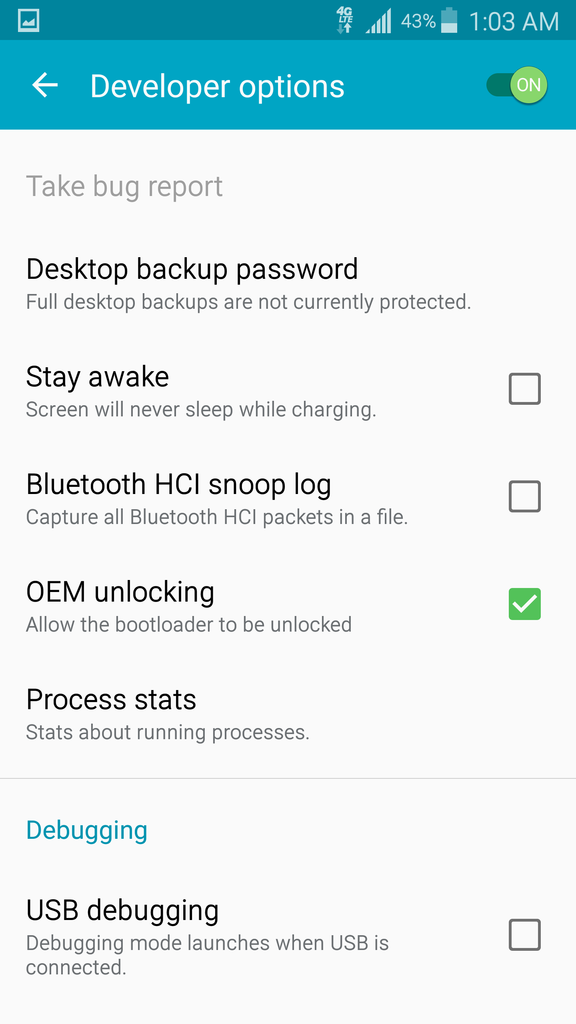
STEP -1 -> OEM unlocking must be enabled: (Settings -> About -> Tap "Build number" 6 Times... now Settings -> Developer Options -> OEM unlocking
STEP 0 -> Make sure you already have the Samsung USB Drivers installed; if not... Download them from the link above and install them.
STEP 1 -> Unzip the ODIN File (Odin307.zip)
STEP 2 -> You will now have a program called Odin3 v3.07.exe... Run the program as Administrator (Right click, run as administrator) Once you open Odin3 v3.07.exe you will have a screen with only 1 checkmarks on it.
CUSTOM RECOVERY (TWRP RECOVERY)
STEP 3 -> NOW ON THE PHONE - Turn OFF Your Phone and Turn it back ON by pressing POWER + VOLUME DOWN + HOME button together at the same time. A Warning Screen will come up; press Volume Up button to enter DOWNLOAD MODE.
> > > NOW CONNECT PHONE TO PC VIA USB < < <
STEP 4 -> Now back to ODIN v.3.07, then click on PDA and browse for the file twrp-2.8.7.0-trltetmo.img.tar.
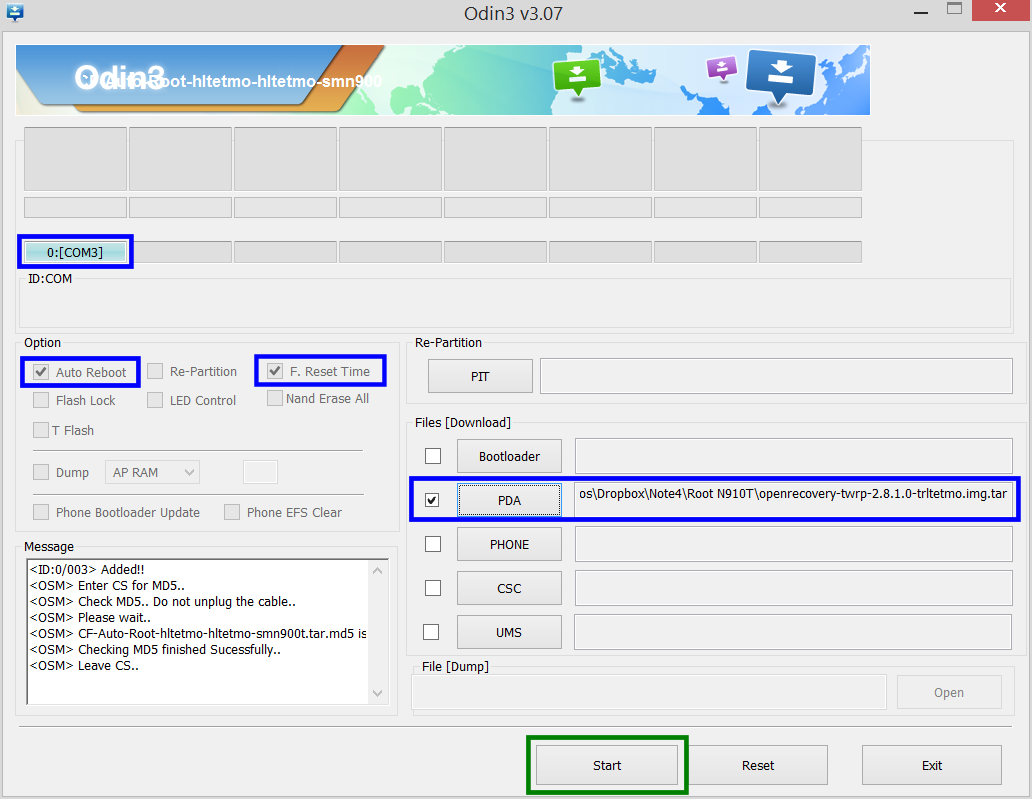
>>> Now, If you are a 100% sure that your program looks like the picture above... Click START > > PHONE WILL REBOOT AFTER FLASHING RECOVERY . . .
-> You now have a Custom Recovery! (TWRP)
FLASHING CUSTOM KERNEL (You will be able to root your device with this Kernel)
> > > Make sure the file BeastModeStock1.0-N910P-OG5.zip is in your Internal SD Card (Phone's Internal Memory < < < DO NOT UNZIP THIS FILE, SIMPLY COPY AND PASTE IT IN YOUR PHONE
STEP 5 -> Now turn OFF Phone Again... This time you are going to the recovery... (Not Download Mode) So basically after the phone is off, you just turn it on by pressing POWER + VOLUME UP + HOME button together at the same time.
-> You will see this... SEE PIC BELOW . . .
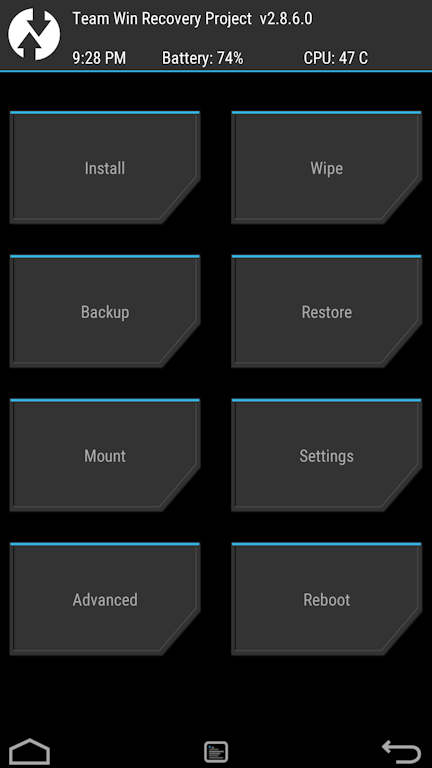
STEP 6 -> Now hit INSTALL (upper left) > then browse for the file BeastModeStock1.0-N910P-OG5.zip.
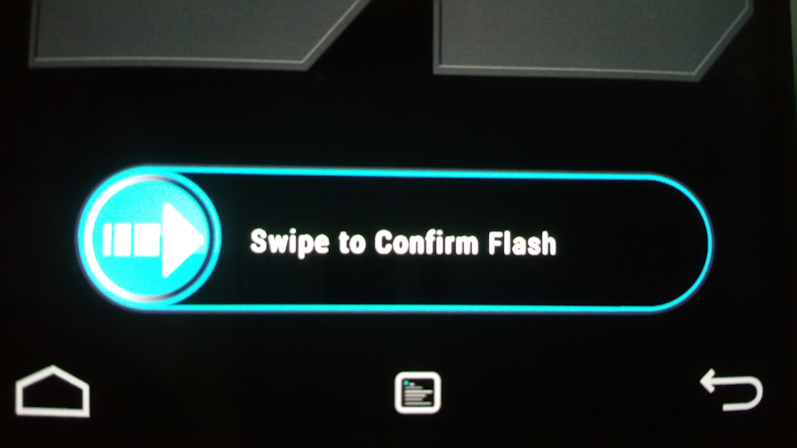
And Swipe to Install...
Flashing is complete...
Exit Recovery... Then reboot and make sure you hit "DO NOT INSTALL"
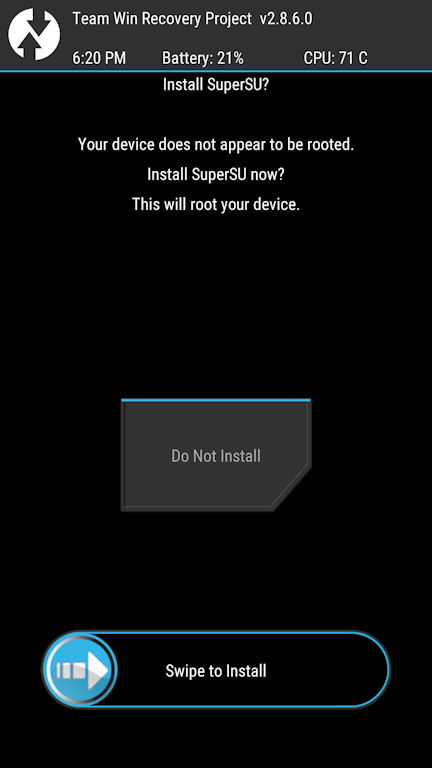
Let it boot completely... NOW, when android boots... you might get some KNOX FC's... that's normal... continue the guide...
ROOTING ANDROID (You are now ready to root your device)
STEP 7 -> Now turn OFF Phone Again... This time you are going to the recovery again... (Not Download Mode) turn phone off, then turn it on by pressing POWER + VOLUME UP + HOME button together at the same time.
-> You will see this... SEE PIC BELOW . . .
STEP 8 -> Now hit INSTALL (upper left) > then browse for the file UPDATE-SuperSU-v2.46.zip.
And Swipe to Install...
Flashing is complete...
Exit Recovery... Reboot (System Option in TWRP) Let it boot again... NOW, when android boots... you might get some KNOX FC's... that's normal... continue the guide...
EXTERNAL SD CARD WRITE FIX (This will make the APPS like Root Explorer / Titanium Backup and any other;... able to WRITE to EXTERNAL SD CARD, NOT JUST INTERNAL)
> > > Make sure file DOFC-DOG1_SD_Write_Fix_Mod_TEKHD.zip is in your Internal SD Card (Phone's Internal Memory < < < DO NOT UNZIP THIS FILE, SIMPLY COPY AND PASTE IT IN YOUR PHONE
STEP 9 -> Now turn OFF Phone Again... This time you are going to the recovery... (Not Download Mode) So basically after the phone is off, you just turn it on by pressing POWER + VOLUME UP + HOME button together at the same time.
-> You will see this... SEE PIC BELOW . . .
STEP 10 -> Now hit INSTALL (upper left) > then browse for the file DOFC-DOG1_SD_Write_Fix_Mod_TEKHD.zip.
And Swipe to Install...
Flashing is complete...
Exit Recovery... Reboot (System Option in TWRP)